

PerfectScale is ideal for DevOps, SRE, and Platform Engineering teams seeking to identify misconfigurations that are wasting resources and causing resilience issues in their Kubernetes environment. Additionally, our system provides actionable recommendations on what changes need to be made to CPU and Memory resources to optimize the environment.
However, in most cases, these teams are not responsible for implementing the recommendations and rely on the developers who deployed the services to make the configuration changes when inefficiencies are detected by our solution.
PerfectScale's Jira integration streamlines this process by seamlessly aligning our recommendations with your previously established Jira workflows. With a single click, a Jira ticket can be created and triaged to the appropriate team with details on the issue and exact instructions on how to resolve it.
In this blog, we will provide step-by-step instructions on integrating PerfectScale into your Jira Workspace, helping you quickly and efficiently optimize the cost, and improve the resilience, of your Kubernetes clusters.
Jira Integration Implementation
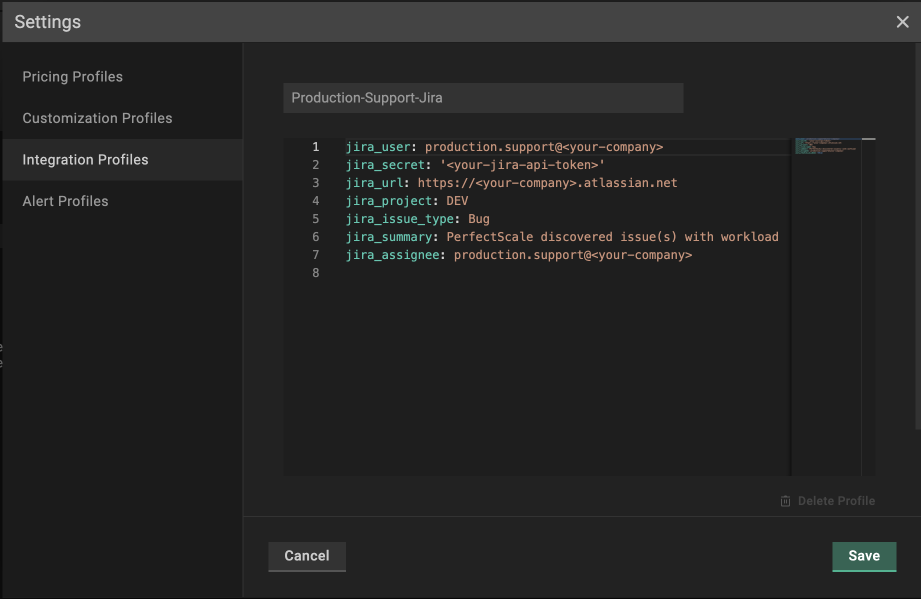
- To start, go to the “Settings” area of the platform, and click on “Integration Profiles”
- Click “Add Integration” and select Jira
- From here, you will find a simple interface that will connect PerfectScale with your Jira Workspace, along with some configuration options to customize the tickets. Here is a breakdown of each option:
Configuring Jira Integration
Profile Name:
The Profile Name is used to designate which cluster will be associated with a specific Jira account. If you would like to connect multiple Jira accounts to your PerfectScale instance, make sure each profile has a descriptive name so it is clear which profile should be associated with each cluster.
jira_user:
This will be the email address for the Jira user that will be associated with the integration. We suggest you create a programmatic user for the integration instead of an individual's user id.
jira_secret:
This is where you insert the API token to connect PerfectScale with your Jira account. It is important to note, the API token must be created by the same Jira User in the above section, or you will not be able to successfully validate the account. You can create your Jira API token here.
Note: To ensure your API code is encrypted, it will appear as *** once you click “Save”.
jira_url:
This is where you link your Jira tenant URL (usually <companyname>.attlassian.net).
jira_project:
This is where you can configure which Jira project you want issues sent to.
jira_issue_type:
This is where you can configure how you would like to classify the issue. OOTB we have this listed as a Bug.
jira_summary:
This is where you can configure the name of the issue.
Note: You can configure the text, but the integration will automatically include the name of the entity that the issue is created for. For example, if a ticket is created for an issue with a workload, the name of the workload will be included on the ticket.
jira_assignee:
The default assignee when a Jira ticket is created.
- Once you have completed the configuration, simply click “Save”.
Associating your Jira Profile to a Cluster
Now that you have set up your Jira Profile, you need to associate it with the applicable clusters. This can be done in a few quick steps.
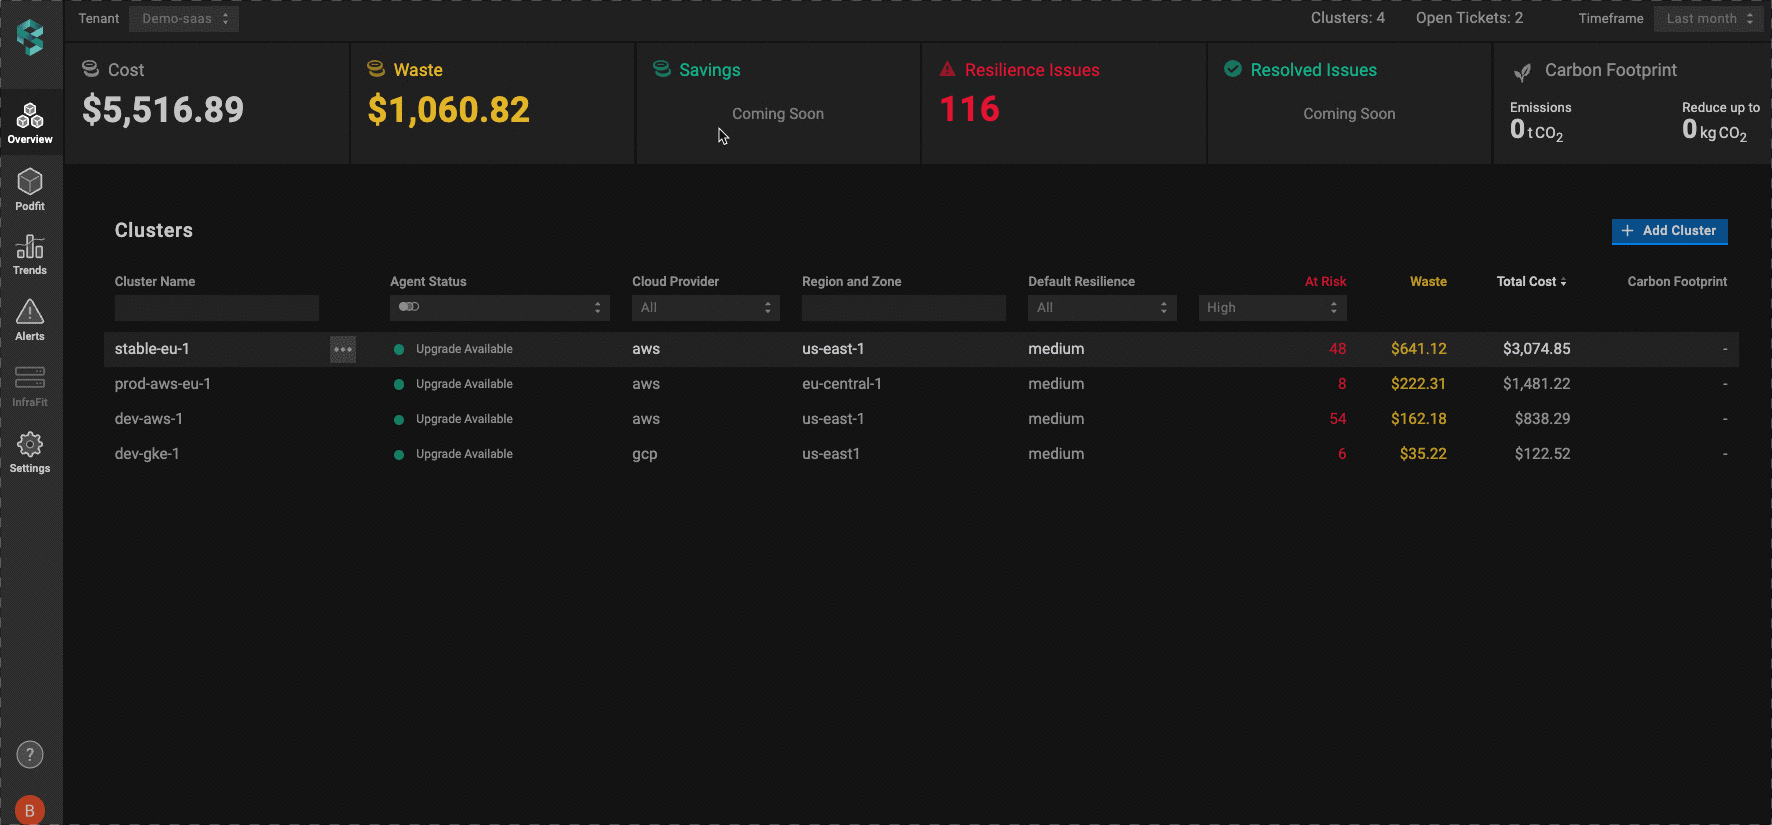
- Go to the “Overview” tab, and hover over the cluster you want to connect with the Jira Profile.
- Click on the three dots and select “Cluster Settings”.
- Go to the “Available Integrations” drop-down and choose the proper Jira Profile.
- Click “Save Changes”.
Repeat these steps until all of the necessary clusters are connected with Jira.
Submitting a ticket
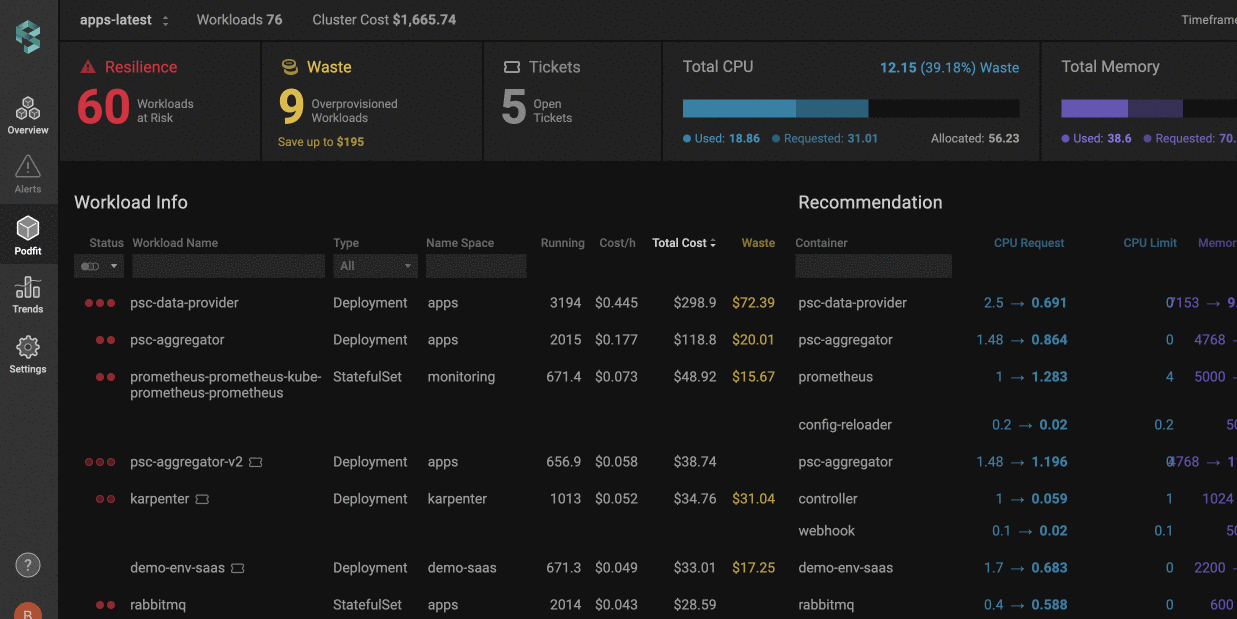
The Jira integration is accessible in PerfectScale’s Podfit solutions allowing to create of tickets for workloads that:
- Over-provisioned: Wasteful workloads that have more resources allocated than needed, which can impact your cloud bill.
- Under-provisioned: Workloads with not enough resources that are causing resiliency issues like OOM, CPU Throttling or evictions.
To submit a ticket:
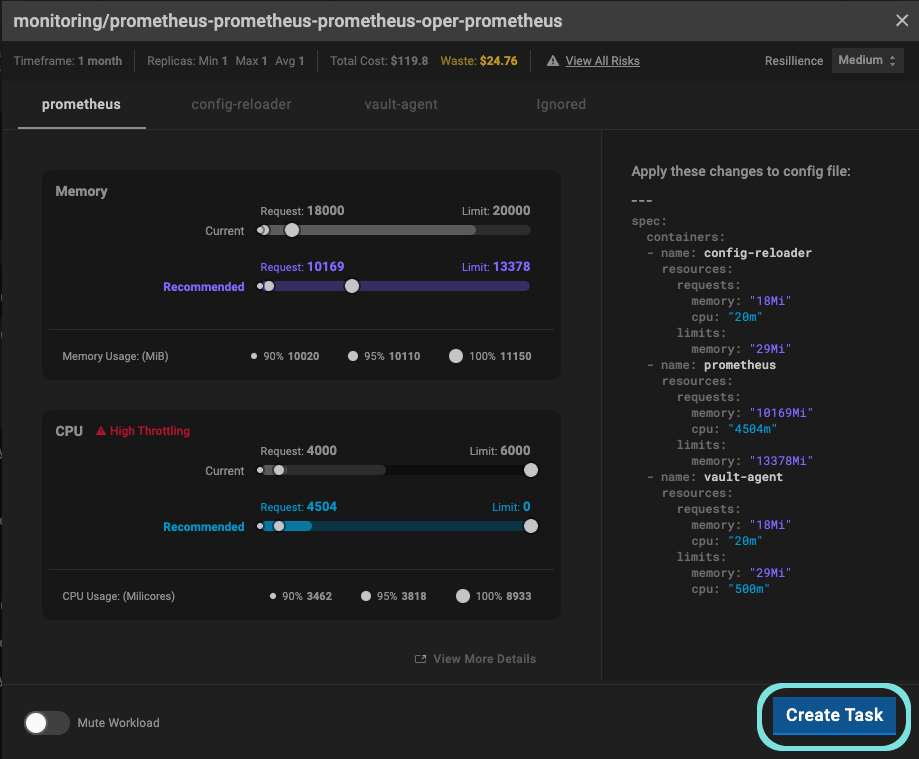
1. Click on a workload that is experiencing an issue(s) to open up the workload zoom-in view.
2. Click the “Create Task” button.
3. When you create a task, a pop-up will appear. Click “View issue”.
4. The ticket will include detailed information about the issue(s) and how to resolve the problem, but you may want to update a few fields before submitting it:
a. Assignee: Set which user or team you want to assign the ticket to.
b. Reporter: By default, the “reporter” is defined by the “jira_user” that was used to set up the integration, but depending on your company’s processes, you might want to update this field for better tracking.
c. Priority: By default, the priority will be set as Medium, however for more severe resiliency issues, you may want to raise the priority level.
5. Click “Create”
Other Jira Integration Capabilities:
At the PodFit Overview Screen
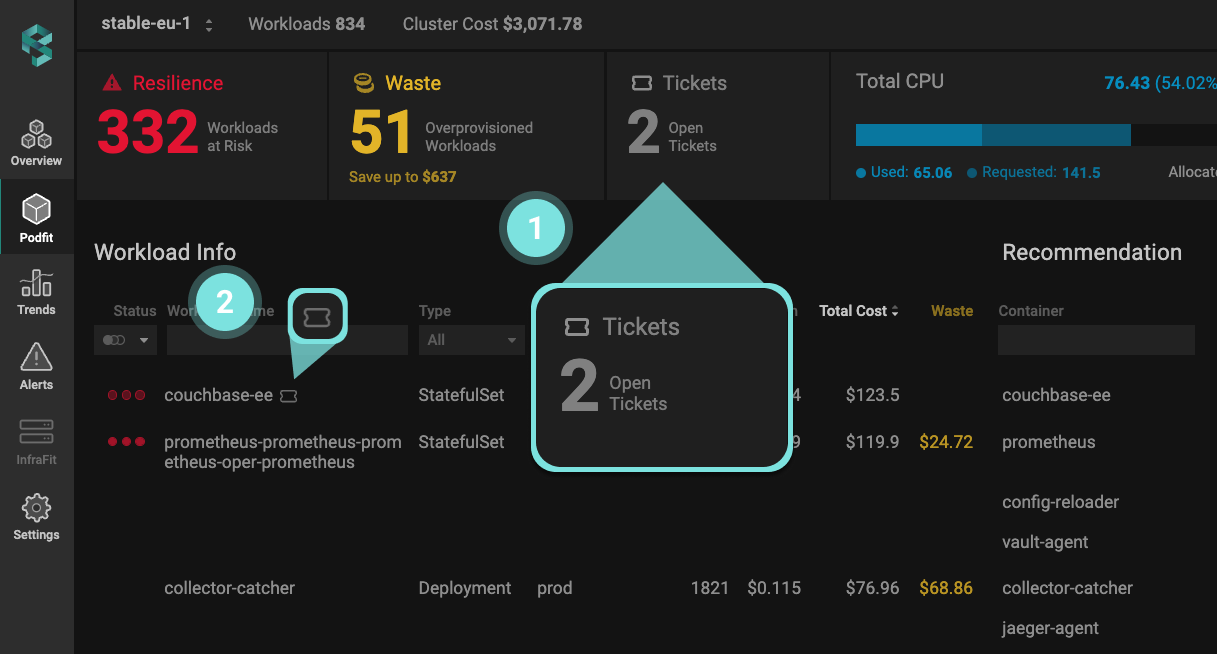
1. Ticket Counter: At any time you can see how many open tickets you have across your entire cluster in the PodFit overview header.
2. Workload-level Open Tickets: If a ticket has been open for a workload, a “ticket indication” icon will appear next to the workflow name, giving you one-click access to view the ticket in Jira. This helps you quickly check the ticket's status and make any necessary comments or updates.
In the Workload Zoom-In Window

3. View Ticket: You can also access an open ticket when looking at the zoom-in view of a workload.
4. Deleting a ticket: If an issue has been resolved, and you want to close the ticket without going to Jira, you can simply click “Delete Task”. This will:
- Update the Jira ticket to a “Done” status.
- Remove the ticket from the “Ticket Counter”
What Happens When a Ticket is Resolved
When a ticket is resolved, the amount of tickets shown in the counter will reduce and the the workload-level ticket indicators will disappear. Tickets can be resolved in two ways:
- Automatically: When a resource configuration change is detected in PerfectScale, the ticket will automatically resolve.
- Manually: You can manually delete a task in the workload zoom-in screen. (See above for details)
The PerfectScale Jira integration is a powerful addition to the platform and can be implemented in a matter of moments. If you would like to learn more about the integration or to book a technical session with our team for assistance with configuration, book a session today.

.png)


.png)


