
In my previous post I started out with Part 1 - Create an EKS Cluster in AWS Management Console.
Using the management console is quick and intuitive. But, as discussed - real platform engineers don't click on buttons. Instead they manage their Infra as Code. And - not all code was created the same. We can identify 3 layers of IaC - each one increasing in complexity and, therefore - flexibility:
- Command line (CLI)
- DSL + Interpeter (e.g HCL + Terraform, yaml + Ansbile, etc)
- Pure programming language (with Boto3, CDK, Pulumi, etc)
So today we will start from the most accessible layer - the AWS cli.

Prerequisites
The AWS Command Line Interface (AWS CLI) is a unified tool to manage all your AWS services (not just EKS). With just one tool to download and configure, you can control multiple AWS services from the command line and automate them through scripts.
In case you still don't have AWS CLIv2 - please follow the official instructions to get it installed.
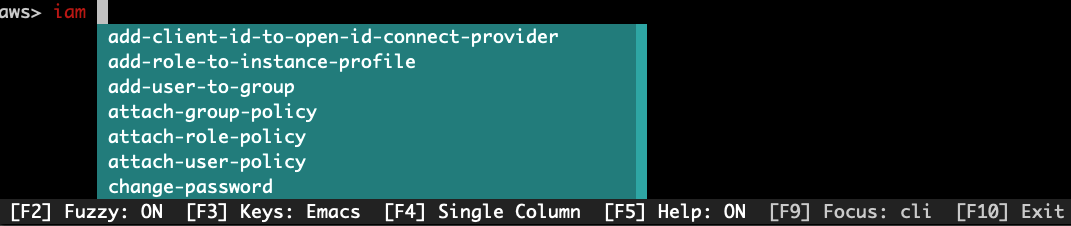
While at it - I heartily recommend you to install aws-shell which boosts your aws cli productivity by providing graphical autocompletion, hints and shortcuts as shown in the image below. I only discovered it recently myself and it's definitely a game changer!
Of course once you get the cluster running it's highly desirable that you also have kubectl and/or OpenLens installed to interact with the cluster. But that's not specific to this EKS provisioning method.
Creating a VPC
I skipped this part in the description of Way 1.
But when working with the CLI - it makes sense to wrap everything into one script (provided in the accompanying repo) so let's create the VPC right here.
The required VPC config is non-trivial - with 2 public and 2 private subnets and all the associated gateways, route tables and security groups. Luckily, AWS provides a CloudFormation template to make this easier, so we'll just use that.
The template defines a default IPv4 CIDR range for your VPC. Each node, Pod, and load balancer that you deploy is assigned an IPv4 address from this block. It provides enough IP addresses for most implementations, but if it doesn't, then you can change it. For more information, see VPC and subnet sizing in the Amazon VPC User Guide.
Create the VPC CloudFormation stack:
Stack creation takes a few minutes but the CLI prompt returns immediately. In order to check the stack status please run:
Once it returns:
We can continue to ->
Creating the Cluster Role
As mentioned in the previous post - we have to create an IAM role that will allow the control plane of our EKS to manage its nodes. We will name our role for this blog post Way2EKSClusterRole.
The following comes from the official guide, but as all of these commands are executed from the CLI - it makes sense to put them here:
Add the following code in a file eks-cluster-role-trust-policy.json:
Create the IAM role:
Attach the Amazon EKS managed policy named AmazonEKSClusterPolicy to the role:

Finally - Let's Create the Cluster
Now that we have the VPC and the role - we can create the cluster. First - define the environment variables. Feel free to modify these as appropriate for your environment:
Note I'm using the --query option to retrieve the necessary resource properties and --output text to make sure they are not quoted. This is needed to use them as env vars in the following command that finally creates our cluster!
It takes a several minutes to create the cluster. You can verify it's been created by running the following command:
If the response is "ACTIVE" - we're good to go and connect to the cluster by generating a kubeconfig definition:
Adding a NodeGroup
Once this works and we can successfully run kubectl get nodes - we recall we still need to add nodes. The options here are abound - we can choose between managed and unmanaged node groups (or even AWS Fargate), we can define which AMIs and instance types to choose and if the resulting machines will Spot or On-Demand. This is really beyond the scope of my post. Right here we'll opt for a minimum viable nodegroup - with defaults defined by AWS.
Creating the Node Role
Our nodes also need an IAM Role - to pull container images from ECR, to assign IPs for the AWS CNI and a bunch of other stuff.
Let's create that role:
First, define the trust relationship in node-role-trust-relationship.json
And now create the role and attach all the necessary policies:
A side note about IPv6
All the commands I give only provision a cluster with IPv4 support, because that's what the majority of us need. Should you need IPv6 support - please refer to the official docs.
Finally Create the NodeGroup
There's a funny quirk in the way subnet ids are passed to this command. In aws eks create-cluster subnet ids need to be comma-separated. But in create-nodegroup they are for some reason expected to be separated by spaces... Go figure this out :))
So first do this:
And then:
This create a NodeGroup with the default scaling params of
If you need a different scaling config - modify this accordingly with the --scaling-config option of the create-nodegroup subcommand.
After a few minutes we can recheck our nodes by running:
Which should give us something like:
And we now have an EKS cluster all created from the CLI!
And you can even connect it to PerfectScale to start monitoring and optimizing your Kubernetes resource usage right from the start - sign up here
Conclusion
Creating an EKS cluster can be done with (relatively) simple AWS CLI commands. There are a lot of commands to run, and while they can be wrapped in a script and parameterized - it's still not a very good solution.
The good thing is that we don't need anything beside AWS CLI. (Well, some CloudFormation, but it's AWS-provided.)
The worst part is that such a script isn't idempotent. Once we create all (or some of) these resources - the script isn't going to work. Also removing all the multiple resources we've created is a lot of manual work.
And that's why we're going to explore additional (better) ways of provisioning an EKS cluster.
See you in the next installment of this series.

.png)
.png)


.png)


